Essential Guide to Flooring Installation: From Prep to Price

Installing a new floor can be a detailed and time-consuming task, requiring meticulous planning and budgeting. However, it rejuvenates your space and can enhance your property's value.
Understanding the Flooring Installation Process and Costs
Before starting a flooring installation project, it's essential to understand the process and the associated costs. These can vary significantly depending on the type of flooring and whether you choose to install it yourself or hire professionals. This guide will walk you through the essential steps of flooring installation.
General Steps for Flooring Installation

Though the specifics may differ based on the type of flooring, the installation process generally follows these steps:
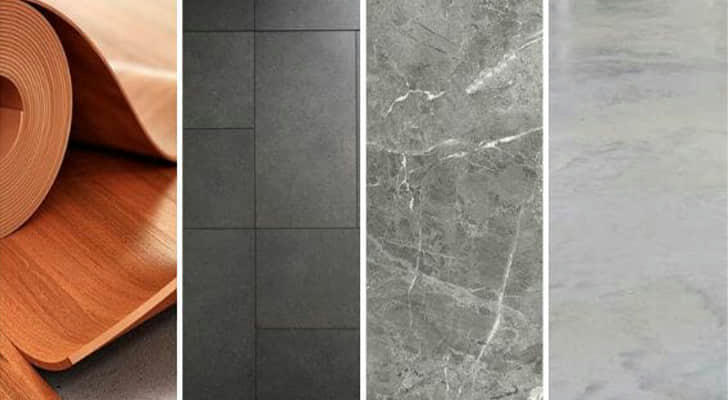
Choosing a Floor Type: Begin by selecting the type of flooring you want to install. Common options include wood, carpet, laminate, and vinyl or LVT. Your choice will depend on your budget, interior design, and personal preferences.
Measuring the Room: Accurate measurements are crucial to ensure you purchase the right amount of materials. Always buy a little extra to account for mistakes or unforeseen issues.
Acclimatization: Different flooring materials need time to adjust to the room's conditions, which can take from 48 hours to a week. This step helps prevent future issues like shrinking or warping.
Preparing for Installation: Safety is key. Use goggles, gloves, and knee pads to protect yourself while handling power tools for subfloor preparation, cutting, and fitting the flooring.
Surface Preparation: Ensure the surface is even before laying the floor. This step is critical for a smooth and stable installation, possibly requiring an underlayment.
Planning the Layout: Sketch out your floor design, starting from a corner or the center of the room, depending on the flooring type. This plan will help you determine the number of cuts needed for the perfect fit.
Laying the Floor: Begin fitting the floor from the designated starting point. Use adhesive, nails, or click systems to secure the flooring, based on the type you are installing.
Cutting to Fit: Trim the final pieces to ensure a proper fit, leaving room for expansion gaps to avoid future distortion.
Cleaning and Finishing: After installation, allow the floor to set for the recommended time, then clean it thoroughly. Once done, you can move your furniture back and enjoy your new floor.
What Preparations Are Required Before Installing a New Floor?
Regardless of the type of floor you choose, it's essential to properly prepare the subfloor. A clean, level surface without any holes or bumps ensures a smooth installation. Follow these steps to get ready:
Remove Existing Flooring
If you're installing over an existing floor, remove the old flooring first. Use appropriate tools like hands, static and power tools, or walk-behind scrapers to strip away the old material.
Clear Away Debris
Sweep away dirt, debris, and material scraps using a broom or a hard-bristle brush to ensure a clean surface.
Inspect for Damage
After cleaning, inspect the subfloor thoroughly for any visible or hidden defects. This detailed inspection will help you identify any issues that need fixing.
Repair the Subfloor
Fix any defects by filling gaps and holes, smoothing out bumps, and flattening the entire surface. Allow any applied materials to dry completely.
Install Underlayment
Depending on the subfloor and the type of floor you plan to install, lay an appropriate underlayment. This layer enhances floor longevity, comfort, and improves sound and moisture insulation.
Is Underlayment Necessary?
Not all floor types require underlayment, especially those with built-in padding or click-lock technology. However, adding underlayment can enhance the floor's durability, appearance, and performance.
Different Flooring Installation Methods

Various flooring materials have specific installation requirements. Here are some common types:
Laminate Flooring
Laminate flooring is popular due to its easy installation. Follow these steps:
Acclimate the Laminate: Allow the laminate to adjust to the room's conditions for at least 48 hours.
Prepare the Subfloor: Ensure the subfloor is suitable for laminate installation. It should be smooth, clean, and even. Laminate can be installed over tiles, hardwood, linoleum, plywood, and LVT.
Add Underlayment: Use cork or foam to create an even subfloor.
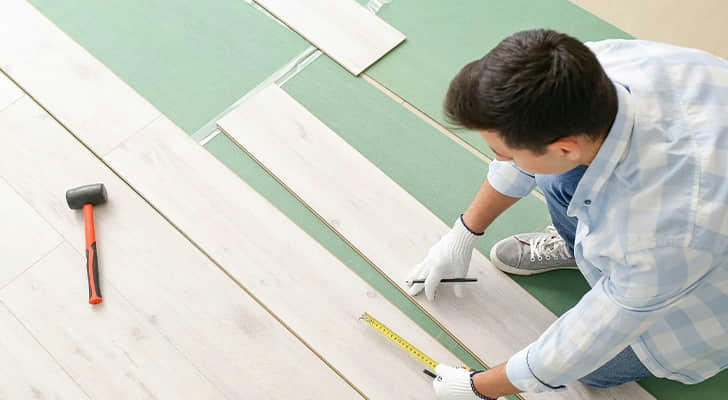
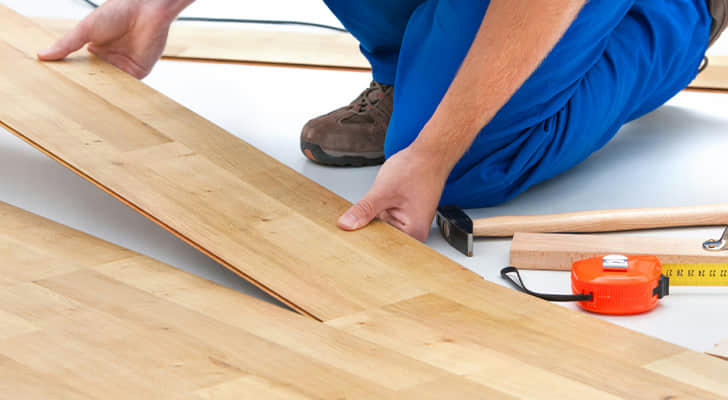
Lay Laminate Planks: Start from the corner of the room, laying planks one by one with an expansion gap of at least 8 mm. Use a rubber mallet or tapping block to secure the planks.
Cut and Fit: Cut the planks as needed around doors and pipes. Use laminate floor edgings to cover expansion gaps.
Wood Flooring
Wood flooring is elegant but requires careful installation. Follow these steps:
Acclimate Wooden Floors: Let the wood adjust to the room's humidity levels for at least three days.
Prepare the Subfloor: Wood floors can go over concrete, plywood, cork, and vinyl. Ensure the subfloor is flat, clean, and dry.
Check Moisture Levels: Use a moisture meter to ensure the subfloor's moisture content is below 12%.
Lay Wooden Planks: Start from the corner, leaving at least 10 mm expansion gaps. Spread glue, nail, or click the planks together.
Cut to Fit: Trim the last row to fit snugly, ensuring expansion gaps.
Finish: Use skirting or quarter-round moulding to cover expansion gaps.
Vinyl Flooring
Vinyl is a cost-effective and attractive option. Here's how to install it:
Choose Vinyl Type: Decide between sheets, planks, or tiles. Sheets may require more cutting.
Acclimate the Vinyl: Let the vinyl adjust to the room for 48 hours.
Prepare the Subfloor: Make sure the subfloor is perfectly flat, as vinyl is thin and shows every bump. Use a leveller if necessary and let it dry before sanding it smooth.
Lay Vinyl: For sheets, unroll and fit them along the walls, securing with double-sided tape before applying adhesive. For planks or tiles, glue them down in small sections, removing excess adhesive and using a floor roller to flatten.
Cut to Fit: Trim vinyl around edges, pipes, and doors, leaving expansion gaps if using LVT or LVP.
Add Profiles: Use profiles to join vinyl sections or ensure smooth transitions between different floors.
Dry Time: Allow at least 24 hours for the adhesive to set before using the floor.
Carpet Installation
Carpet adds warmth and comfort to a room. Here's a simple guide to installing it:
Choose the Carpet: Select the type of carpet best suited for your room.
Prepare the Subfloor: Depending on the condition, either remove the old flooring or lay chipboard panels or hard floor underlayment for a smooth surface.
Install Fitting Grippers: Secure grippers with glue or nails, leaving a few millimeters gap from the skirting boards.
Add Underlayment: Lay underlayment to provide insulation and comfort underfoot.
Cut the Carpet: Lay the carpet loosely, starting from a corner. Cut it to fit around edges and corners.
Stretch the Carpet: Use a stretcher to pull the carpet tight and hook it onto the grippers.
Install a Door Bar: Secure a door bar where necessary to join different floor types or cover thresholds.
Essential Tools for Flooring Installation
Before starting your flooring installation, gather all necessary tools and supplies to ensure you have everything on hand. While some tools from your DIY toolbox can be used, specific tools may be required depending on the floor type.
Common Tools Needed:

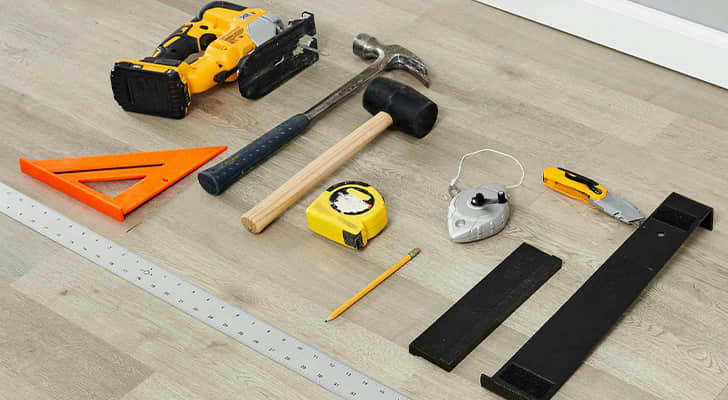
Measuring Tools: Tape measure and ruler or straight edge
Floor Scrapers: Manual or electric
Trowels: For spreading adhesive
Spacers and Nippers: For accurate spacing
Saws: Tile saw, chop saw, and jigsaw for cutting different floor materials
Utility Knife or Scalpel: For precise cutting
Chalk Line: For marking straight lines
Cleaning Tools: Cloths, brushes, buckets, sponges, and a vacuum cleaner
Importance of Proper Flooring Installation Tools
Having the right tools makes the flooring installation process faster and more efficient. This is crucial not only for laying the floor but also for preparing the subfloor. Proper tools, including both static and power tools, help remove old flooring, prepare the substrate, and install the new floor correctly.
Must-Have Tools for Flooring Installation
Certain steps in flooring installation are common across all floor types, such as measuring, subfloor preparation, and cleaning. Here are some essential tools for these tasks:
Measuring Tape: For accurate measurements
Floor Scraper: Manual or electric, for cleaning and smoothing the subfloor
Level: To ensure the subfloor is even
Power Tools: Drills, nailers, and saws for various tasks
Spacers: To maintain proper gaps
Supplies: Glue, nails, and underlayment
Cleaning Equipment: To keep the workspace tidy
Specific Tools for Different Flooring Types
Different types of flooring require specific tools for certain stages of installation:
Laminate: Jigsaw, rubber mallet, and tapping block
Wood: Chop or mitre saw, rubber mallet, and pneumatic nailer
Vinyl: Knife or vinyl cutter, and floor rollers
Carpet: Carpet tuckers and stretchers
Cost of Flooring Installation
The average cost for flooring installation in the UK ranges from £400 to £1,000. For a 16 square metre room, the cost can be as low as £140 for carpet installation and up to £1,600 for high-quality wood flooring. The total cost varies based on the type of flooring, room size, and whether you choose to do it yourself or hire professionals.
Calculating Flooring Installation Costs
To estimate flooring costs, multiply the room’s size by the price per square metre of the selected flooring material. This gives a rough estimate, but you should also include the costs of supplies and labour (if not doing it yourself).
Impact of Flooring Type on Installation Cost
Flooring materials vary widely in price based on their quality, durability, features, and thickness. Some floors can be installed by DIY enthusiasts, which saves money, while others may require professional installation due to complexity.
Space Size and Installation Cost
The size of the area being floored significantly affects the cost. Larger spaces require more materials and labour, leading to higher overall costs. Renovating an entire house is more expensive than flooring a single room.
Additional Costs in Flooring Installation
Extra costs may arise depending on the floor type and who performs the installation. These may include:
Old Floor Removal: If necessary
Subfloor Preparation: To ensure a smooth surface
Underlayment Fitting: For added comfort and insulation
New Skirting or Boarding: For a finished look
Cleaning and Garbage Removal: Post-installation
Underfloor Heating: If desired
Removing Existing Flooring
Removing the existing flooring isn’t always necessary, especially if it’s in good condition. Some floor types can be installed over existing floors with proper underlayment. If the old floor is unsuitable, it may need to be removed or covered with a suitable underlayment.
How to Determine the Required Amount of Flooring for Installation
Once you've chosen the room for a flooring update, accurately measuring the space is crucial to determine the amount of flooring material you'll need. A measuring tape and possibly an extra pair of hands will be helpful for this task.
Calculating Room Dimensions for Flooring Installation
The complexity of calculating room dimensions depends on the room’s shape and any obstacles present. Measure the length of all walls and any permanent fixtures. Drawing a sketch and noting all measurements, including details like doors, radiators, and closets, can help ensure accuracy.
Accounting for Doors, Closets, and Obstacles in Flooring Calculations
Permanent structures such as walk-in closets, fireplaces, and pillars do not require flooring. Measure their dimensions and subtract their area from the total room area to get the actual flooring surface. Do not exclude door areas separately as they are included in the wall length measurements.
Methods for Determining Flooring Quantity
Rectangular or Square Rooms: Measure the lengths of two adjacent walls and multiply them to get the area.
Irregular Shapes: Divide the room into smaller rectangular sections, calculate each section’s area, and sum them up.
Triangular or Round Corners: Break the area into sections and use appropriate formulas to calculate the areas of triangles, circles, and semicircles.
Extra Flooring Material for Cutting and Fitting
Expect some wastage during installation. Purchase 5-10% more flooring material than the measured area for standard rooms. For irregularly shaped rooms, increase the excess to about 15% to account for more complex cutting and fitting.
Flooring Installation Timeframe
The time required for flooring installation varies based on several factors:
Room Size: Larger rooms take longer.
Floor Type: Some materials are easier to install than others.
Subfloor Condition: Prepping the subfloor can add time.
Installation Skills: Skilled fitters can complete the job more quickly.
Number of Workers: More people can speed up the process.
Typically, installation can range from a few hours to several days, depending on these elements.
DIY vs. Professional Flooring Installation
DIY Installation Benefits:
Opting for DIY flooring installation comes with several advantages:
Cost Savings: Installing the flooring yourself can be more budget-friendly than hiring professionals.
Convenience: No need to search for reputable fitters or schedule appointments, allowing you to work on your own timeline.
Customization: You can create unique designs and patterns according to your preferences.
Flexibility: You can work at your own pace, adjusting the project to fit your schedule.
Professional Installation Benefits:
Hiring a professional for flooring installation offers its own set of benefits:
Efficiency: Professionals come equipped with the right tools and expertise to complete the job quickly and effectively.
Experience: They follow proven methods for installation, ensuring high-quality results.
Cost-Effective Materials: They may offer flooring materials at reduced prices due to their industry connections.
Convenience: You save time and effort, as professionals handle all aspects of the installation.
Warranty: Professional installations often come with a warranty for peace of mind.
Maintaining Your Newly Installed Flooring
Daily Maintenance:
To keep your new floor looking its best, incorporate these daily habits:
Sweep or Vacuum: Regularly removing dirt and debris helps prevent scratches and prolongs the life of your flooring.
Clean Spills Promptly: Address spills immediately with a dry cloth or paper towel to avoid water damage and accidents.
Prevent Damage: Use rugs in high-traffic areas, protect furniture legs, and avoid moving heavy items to minimize scratches.
Deep Cleaning:
For deeper cleaning, follow these guidelines:
Weekly Cleaning: Use a wet mop for stain removal as needed, while carpets should be deep cleaned at least once a year.
Avoid Harsh Chemicals: Choose gentle cleaners suitable for your specific flooring type to avoid damage.
Keeping Your Flooring Clean
Cleaning Procedure:
Follow these steps to keep your floor clean:
Initial Sweep or Vacuum: Start by removing loose dirt and debris.
Prepare Cleaning Solution: Mix a cleaning agent suitable for your floor type with warm water.
Mop the Floor: Dip the mop into the solution, wring it out to be slightly damp, and mop from one corner of the room to the opposite side.
Rinse and Dry: Rinse the mop in clean water as needed, and dry the floor with towels or let it air dry.
Cleaning Frequency:
Regular Cleaning: Clean floors every three to four days, adjusting for high-traffic areas. Carpets require periodic deep cleaning.
For Homes with Children or Pets: Increase cleaning frequency to address spills, dirt, and pet hair.
Handling Spills and Stains
Immediate Response:
Act quickly to prevent lasting damage:
Spills: Use a dry cloth or paper towel to blot spills.
Stains: For persistent stains, use a mop or soft-bristle brush designed for your floor type.
Cleaning Dirt and Pet Hair:
Hard Floors: Sweep or use a slightly damp mop for dirt and debris.
Carpets: Employ a vacuum cleaner for dirt and debris, and use a rubber brush to lift pet hair.
How to Dispose of Old Flooring
If you're replacing old flooring, you might be wondering how to handle its disposal. Different types of flooring require specific methods for removal and disposal since many materials are not biodegradable but can be recycled.
Are There Regulations for Disposing of Old Flooring?
While there aren’t specific laws governing the disposal of old flooring, the handling of such waste may fall under general household waste collection regulations. This means you should use local waste management services or licensed removal companies to dispose of the old flooring properly.
Eco-Friendly Disposal Options:
Here are some environmentally responsible ways to dispose of old flooring:
Contact Waste Carriers: Professional waste removal services can help with the disposal of old flooring.
Local Recycling Centers: Many areas have recycling facilities that accept old carpets, laminate, or tiles. You can check with local centers or search online to find one near you.
Repurpose: If the flooring is still in good condition, consider using it for other projects, such as flooring for a shed, garage, or doghouse.
Donate: If the old flooring is reusable, donate it to charities or organizations that might find it useful.
Are There Recycling Facilities for Old Flooring?
Yes, most communities have recycling centers that can handle old flooring materials. You can inquire locally or use online resources to locate a recycling facility that accepts carpets, laminate, and tiles.
Will Flooring Fitters Remove the Old Flooring?
Flooring professionals can remove your existing flooring as part of their service, but this usually involves an additional cost. If you prefer, you can handle the removal yourself or arrange for a waste removal service to do it.
